Hi @lef80
I send you through others’ posts to understand your questions.
@jorgearq , in this particular scene the inaccuracy of reflections is caused by the limitation of light probes irrespective of their type (cubic or spherical). To produce realistic reflections of objects at different distances (eg. a standing person in the foreground, and a wall in the background) full 3D information is necessary. However, images captured by light probes are like panoramas - they cover all the surrounding but they are only 2D - so they do not produce enough information for fully realistic reflections.
This is true for light probes in general, so a similar scene in Twinmotion will suffer from similar inaccuracies and distortions of light probe based reflections.
The lightmap space needed for a scene depends on the total area of the objects in the scene, even a small number of large triangles can have large total area.
It looks like you have correctly reduced the resolution for large external objects that don’t need detailed shadows using the Custom lightmap resolution setting. This message says that even after your reduction, the scene still couldn’t be fit into 2 lightmaps and the resoultion was reduced further by 6%. This isn’t a large reduction and shouldn’t affect the quality much . You can check the final resolution used in the Objects tab Auto lightmap resolution property.
As you can see, for important interior objects, the resolution was automatically reduced from 75 to 70 , which isn’t a big difference, but if you would like to avoid this reduction you can further decrease the resolution for the largest external objects.
The main problem seems to be too dark interior, which is not related to the lightmap resolution. To improve this you could:
Decrease the windows opacity for the time of baking to let more sky light inside. After the baking you can increase the opacity back to 0.1 .
Increase the sky strength (for example to 6 or 4 ) and use the Camera volumes feature in the Viewer tab to reduce exposure when the camera enters the balcony to avoid showing overexposed exterior.
you can edit the entire scene all the times that you need, then you upload it again and this process renews the web scene. Upload scenes take a few seconds.
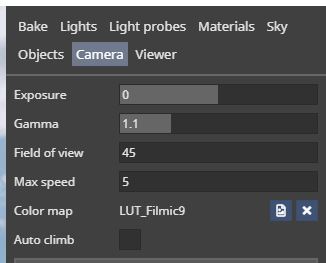
No way to adjust in real-time. But the ease way to adjust that is using the camera tab and set exposure and gamma, you don’t need to re-render, just adjust, save, and upload again.
The post-processing applies a few filters to the baked lightmaps in order to improve their quality, and it is always performed automatically at the end of baking. So, running post-processing manually is needed only when you change these filters settings after the lightmaps have been baked. Currently the only configurable post-processing settings are: Enable filters (which effectively enables/disables post-processing) and the Flood dark limit .
3 Likes